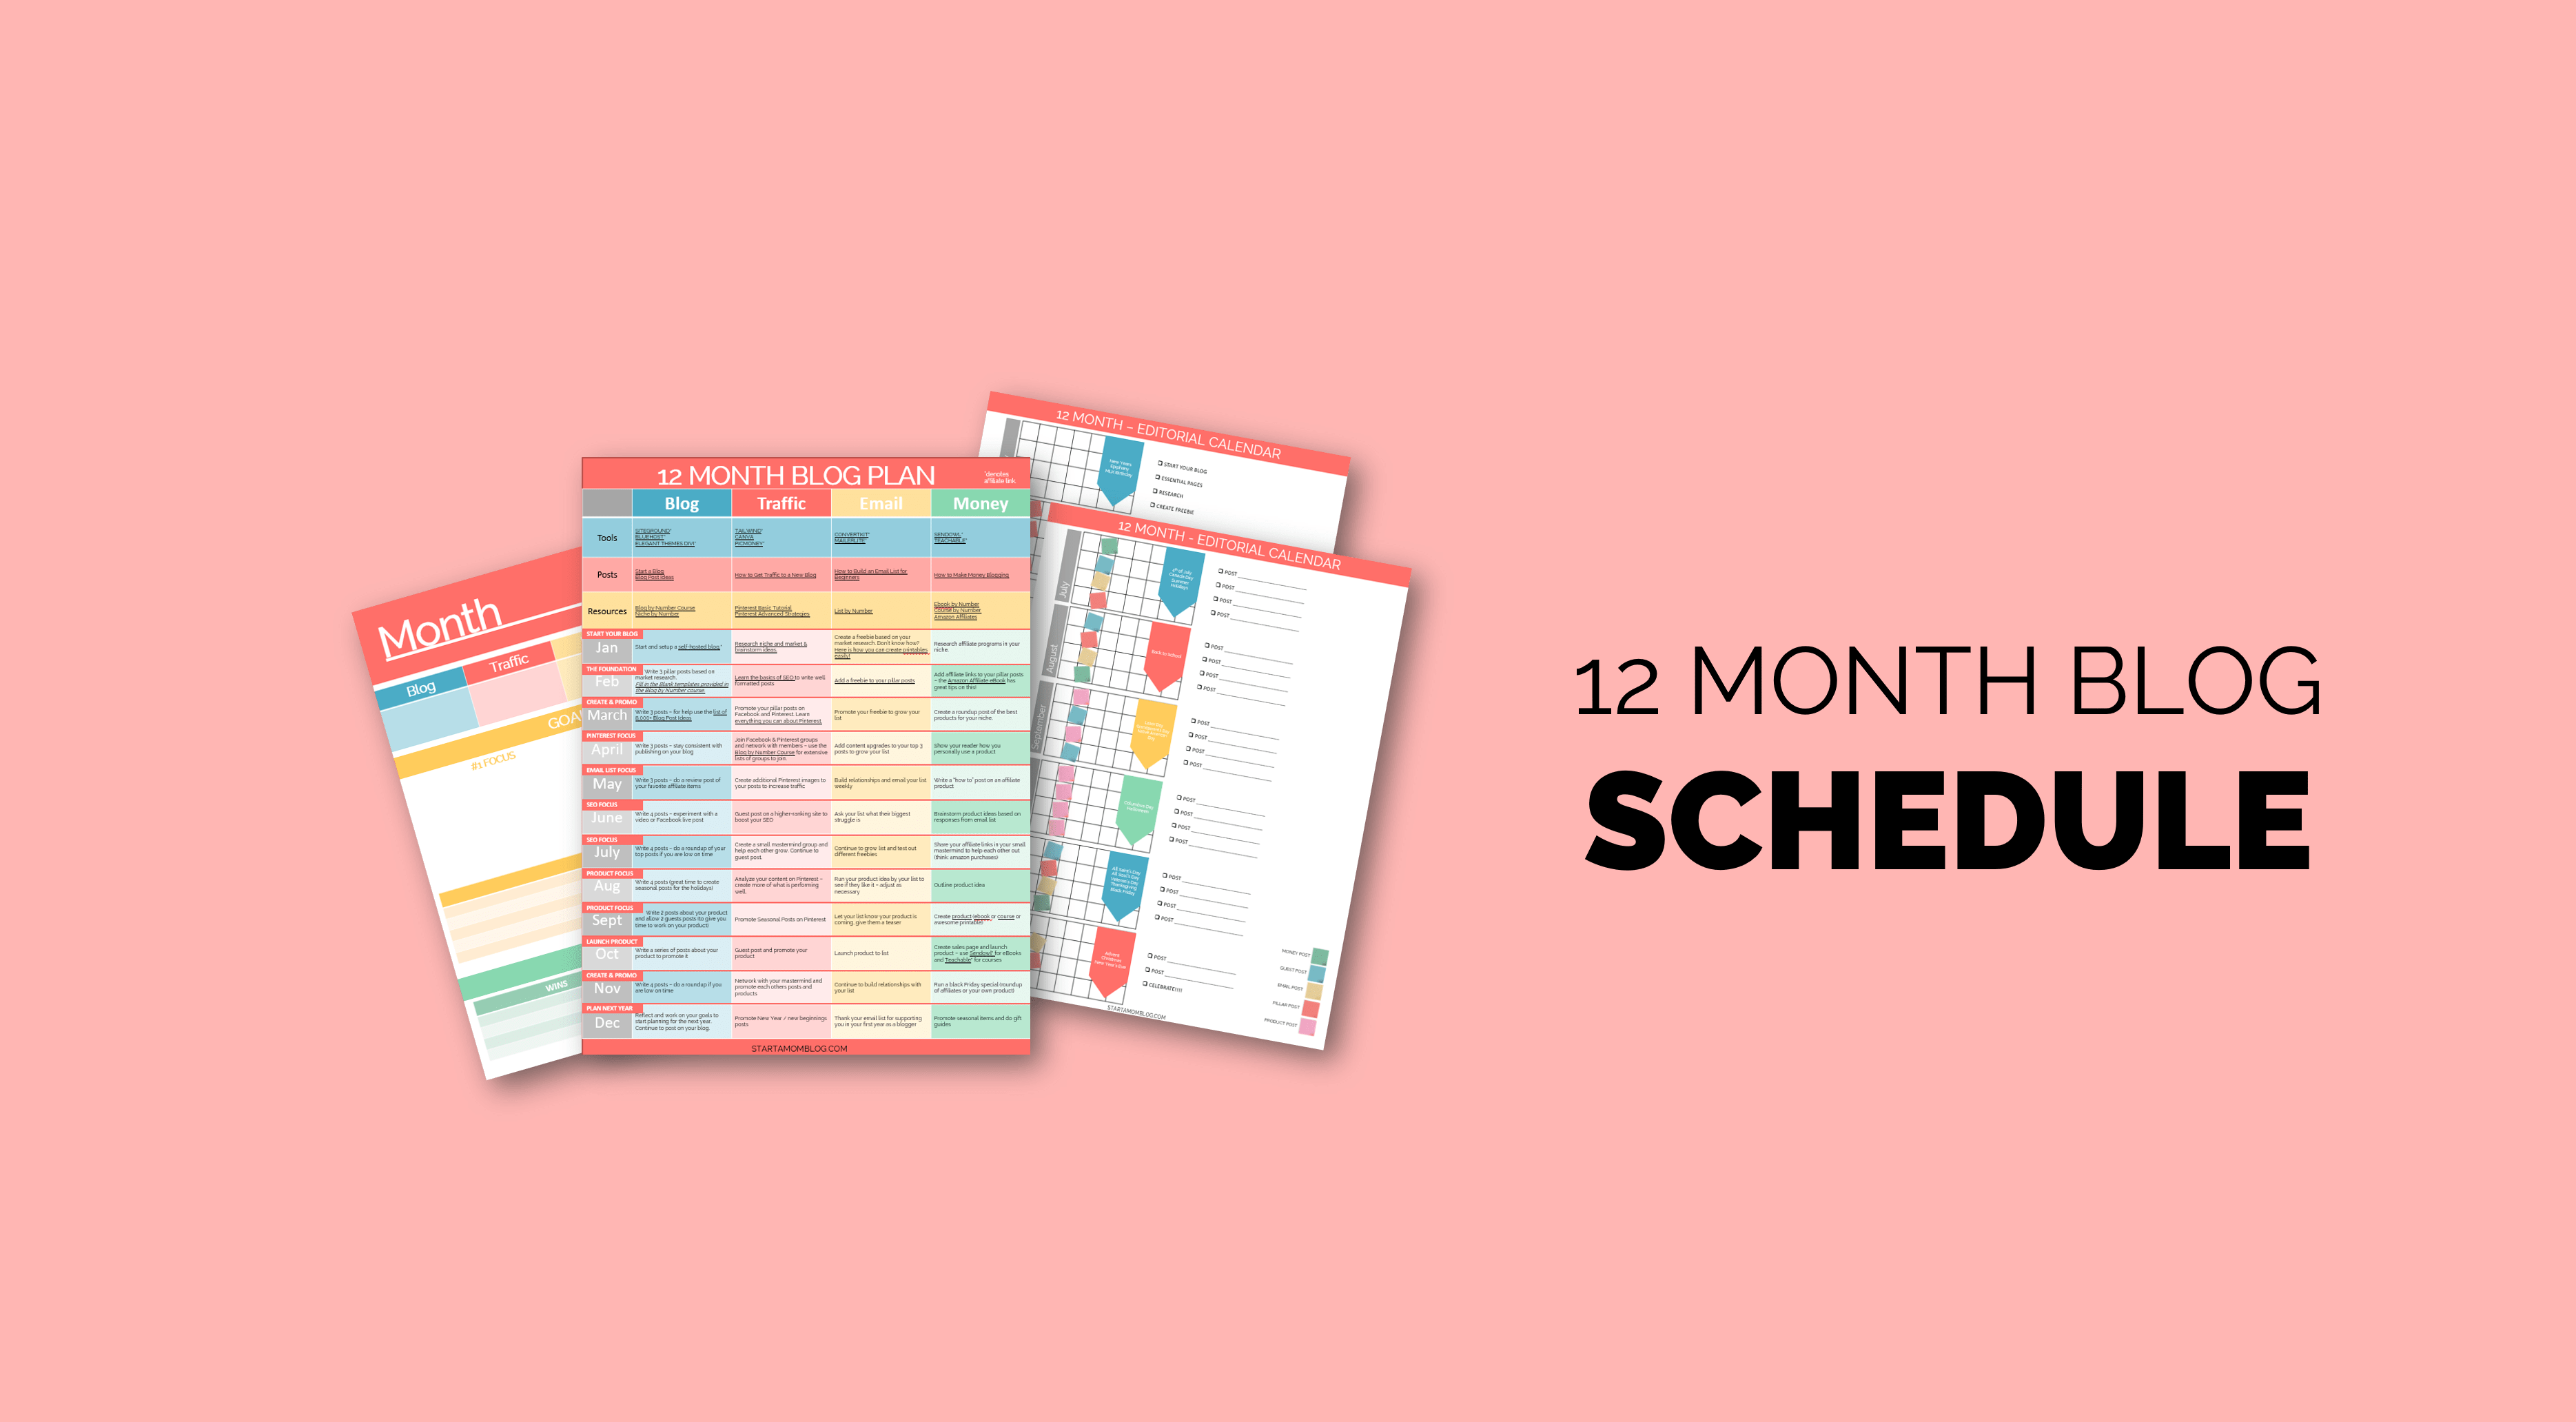
31 Essential Steps to Starting a Blog
Starting a blog the right way is easier said than done. Use the steps below to help guide you as you start and setup your blog for success.
Step 1: Decide if blogging is right for you
Do you like being online? Do you like networking with others and creating content? Are you a good self learner? Blogging has a huge amount of pros, but there are a few drawbacks too. Can you overcome them? Blogging Pros: Flexibility, Location Independent, Unlimited Potential for Income, Lifestyle Business, Inexpensive to start, You are your own boss. Blogging Cons: Time Intensive, DIY, Self Learning, Hard Work.
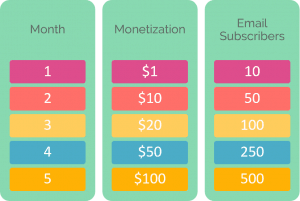
Step 2: Set big goals with realistic expectations
Most serious bloggers can make a few hundred dollars within 6 months of starting a blog. If you know what you’re doing and work on the right things – you can too. See the chart in this post for realistic expectations.
Step 3: Find your passions
What can you not stop talking about? What can you write about for years? What do you want to learn more about and become an expert in?
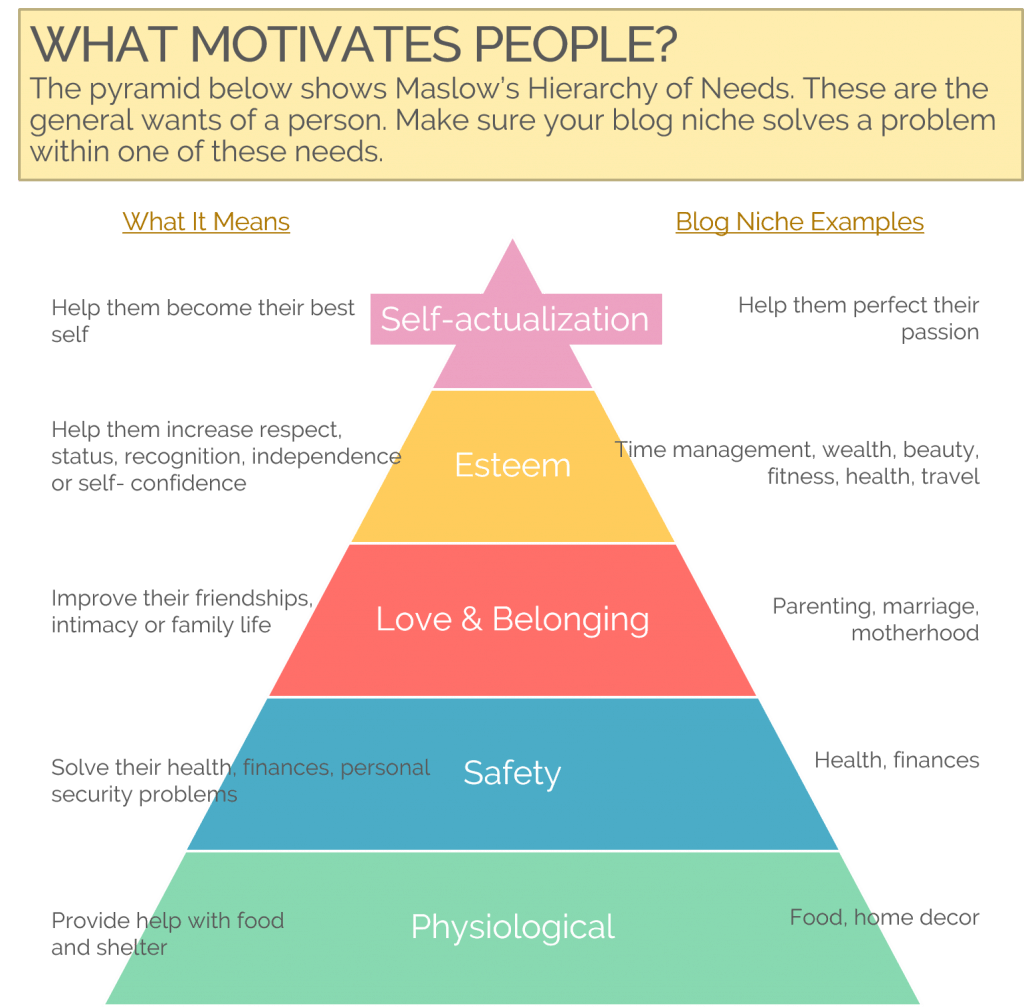
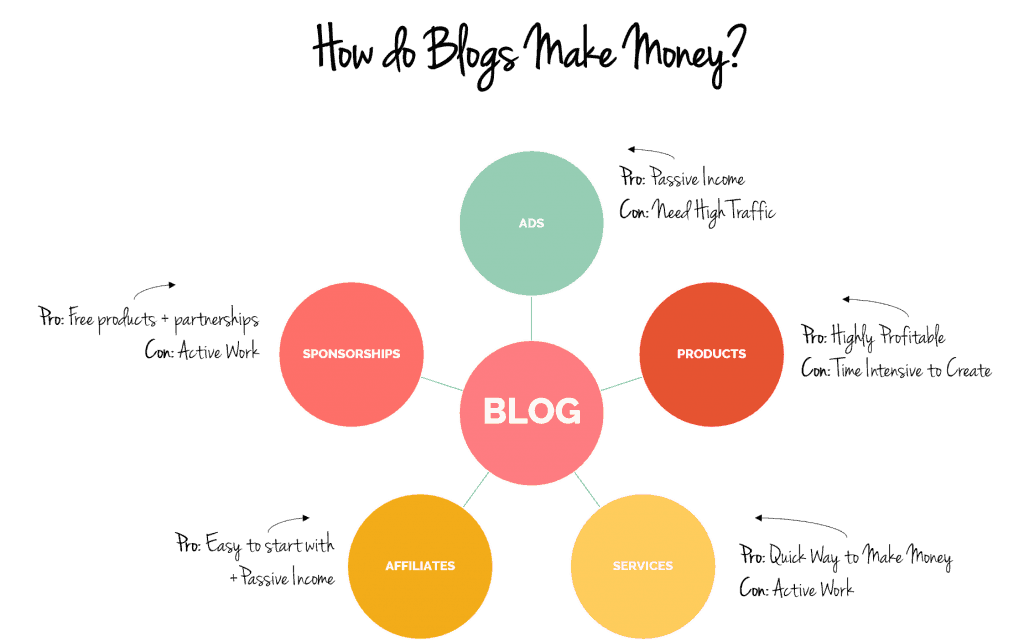
Step 4: Discover your niche
Decide on a profitable blog niche that align with your passions.Use the infographic above to help you narrow down your passion to a profitable blog niche.
Step 5: Name your blog
Decide on a blog name. Choose a generic and simple blog name and start blogging. The more you write, the more you will find your voice and niche.
Step 6: Get your blog set up
Purchase your domain name, sign up for hosting and install WordPress. You need a self-hosted blog with WordPress.org (not wordpress.com – the free platform). When you self-host your blog, you have control of the content and you own your site. You’re also able to monetize it. When you self-host with WordPress.org and SiteGround, you have control of any advertisements you put on your site. Also on the free wordpress.com platform you can’t customize your site, you can’t add plugins to supercharge your blog and your site can be taken down at any time if you violate the Terms of Service.
Step 7: Customize your blog
Don’t over think this. As long as your site is clean and easy to navigate continue working. Don’t waste weeks tweaking the smallest things.

Step 8: Show yourself
Take a great headshot or use a good picture. Have a clean background and friendly picture. You want people to instantly be able to relate to you when they arrive on your blog for the first time.
Step 9: Get analytical
Connect Google Analytics. This will help you monitor your search traffic.
Step 10: Install necessary plugins
I recommend Yoast SEO, Pretty Link, WP Smush and a few others shown in the Blog by Number course. The list can change from time to time as we keep the course updated.
Step 11: Share your story
Write your About Me Page. Be personal and share your vision and story for starting your blog. Also include any points of authority you have on your blog topic.
Step 12: Play by the rules
Write your Disclosure Page. If you’re going to use affiliate links on your blog, you need to have a disclosure page and to disclose all affiliate links on blog posts.
Step 13: Research your topics for your first three pillar posts
Use Google, Pinterest and Buzzsumo to find what is most popular in your niche
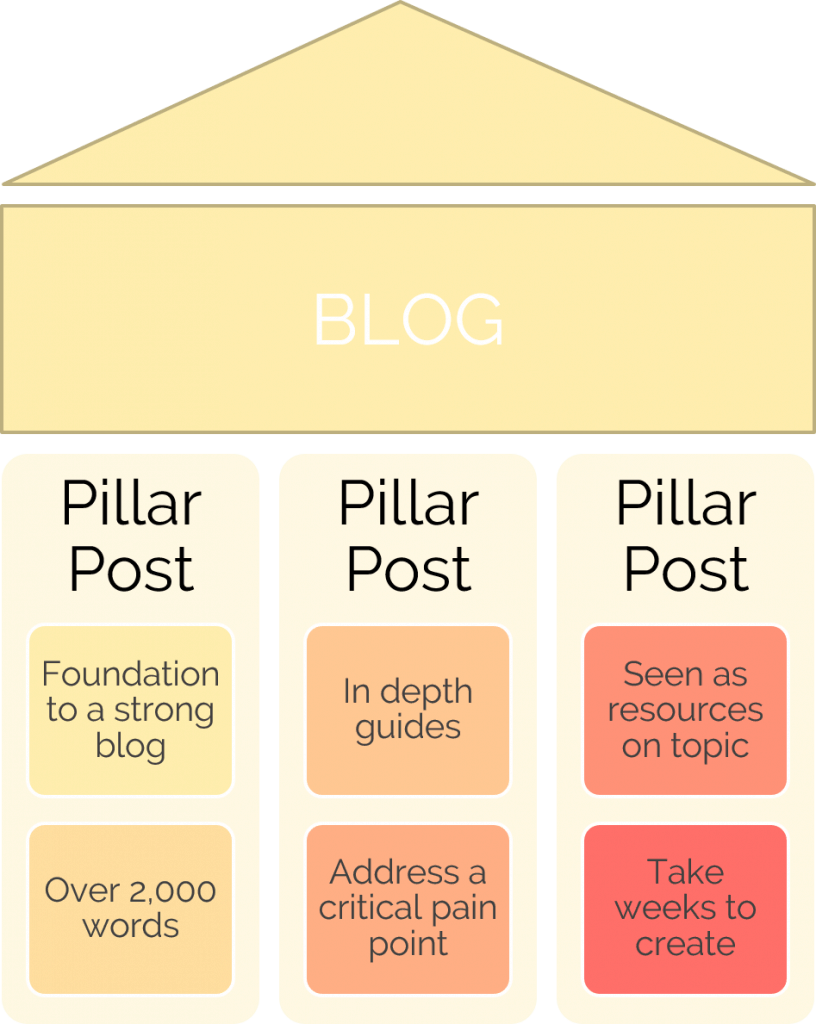
Step 14: Outline your three pillar posts
Pillar posts are in depth, 2,000+ word articles that address a certain main problem of your niche. They will lay the foundation for your blog and share very well on social media. People will see them as ultimate guides or resource tutorials. Take your time crafting these and share all of your best advice. You want people to come to your blog and be blown away by your posts, even if there are just three.
Step 15: Write your first pillar posts
If you’re a blogger to moms with newborns, an example pillar post could be: “The Ultimate Guide to Breastfeeding a Newborn – 6 Month Old”
Step 16: Write your second pillar post
If you’re a blogger to moms with newborns, an example pillar post could be: “The 100 Benefits of Breastfeeding”
Step 17: Write your third pillar post
If you’re a blogger to moms with newborns, an example pillar post could be: “Everything You Need to Know about Breastfeeding and Bottle feeding”
Step 18: Launch your blog!
It’s not as scary as you think! Launching your blog means you’re starting to promote it online. You’re sharing it with your family and friends and you’re pushing traffic to it. Your blog could be ‘live’ even before you launch.
Step 19: Link up for SEO
Interlink your pillar posts to each other and create pinnable images. Make sure your pinnable images are easy to read with a large font, use high contrasting colors, and have great descriptions on Pinterest. Invest in stock images to help your blog gain traffic quickly.
Step 20: Look super professional
Set up your domain name email address. This will make you look super professional right from the start.
Step 21: Social Media
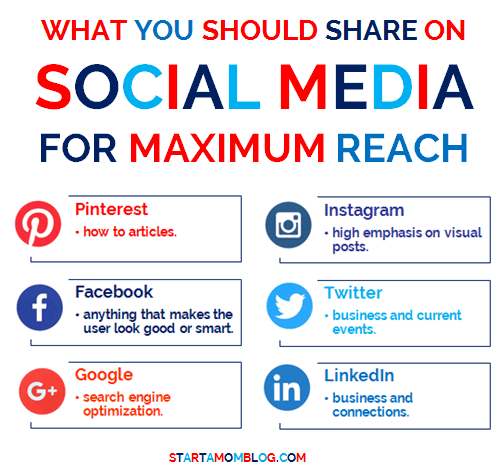
Setup your social media pages and rich pins on Pinterest. Decide on a maximum of 2 social media platforms to promote on when you’re just starting out. Do not try to master them all. I recommend the order below.
- Pinterest = how to articles.
- Facebook = anything that makes the user look good or smart.
- Google = search engine optimization.
- Instagram = high emphasis on visual posts.
- Twitter = business and current events.
- LinkedIn = business and connections.
Step 22: Look alive on Pinterest
Populate your Pinterest Boards. Setting up your Pinterest profile correctly will also make you more likely to be accepted unto group boards.
Step 23: Research what freebie would do well with your audience
Your freebie should be a quick solution to a common problem for your readers. I created multiple freebies before I found one that worked. It takes time to discover what your readers want – so don’t be afraid to test and experiment with different ideas.
Step 24: Create your freebie
I use PowerPoint, Canva or PicMonkey (affiliate link) to create my freebies. See the videos in this post for more help.
Step 25: Connect directly with your readers
Sign up for an email marketing client. I use Convertkit to grow and manage my email list. Their automations, sequences and super fast customer support is perfect for my blog. My email list brings in half of my blog traffic and over 60% of my income.
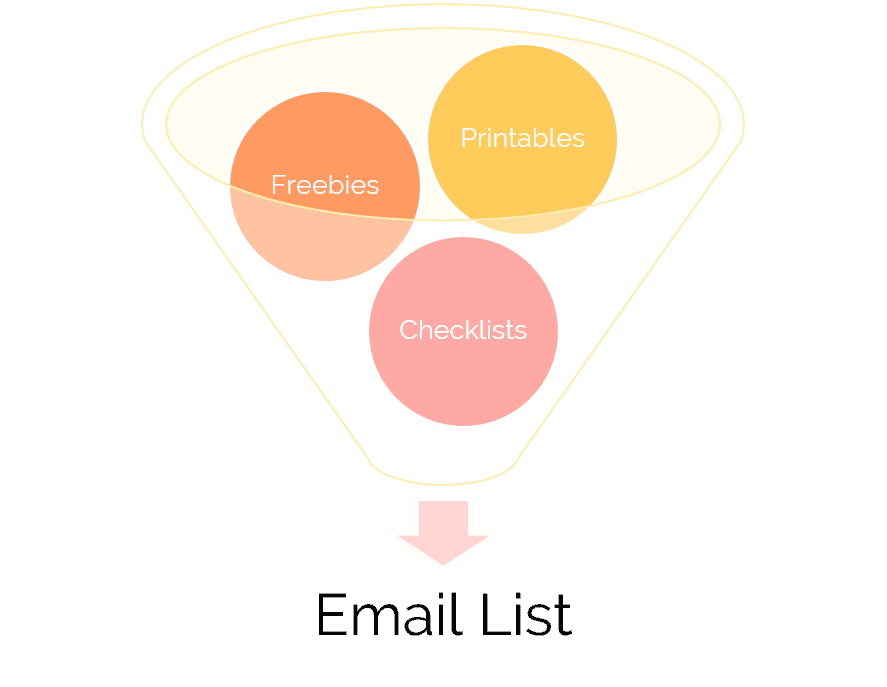
Step 26: Grow your list
Setup your freebie and add it to the top of your pillar posts. You can add your freebie sign up form to the top, middle or bottom of your posts. You can even feature it on your home page to get more subscribers.
Step 27: Create a landing page for your freebie
Another smart way to promote your freebie and grow your email list is to create a landing page for your opt in offer. Here is an example of mine.
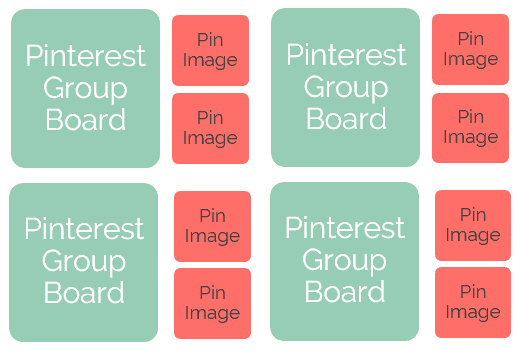
Step 28: Get an steady flow of traffic
Apply to Pinterest boards. When you pin to larger group boards your pins will be seen by more people. Take the time to apply to bigger group boards that are in your niche – this will help your traffic grow!
Step 29: Don’t blog alone
Join Facebook Groups and network with others. Facebook groups are a fantastic way to network with other bloggers, build a small mastermind or accountability group of 4-6 members, and promote your blog (on designated promo days).
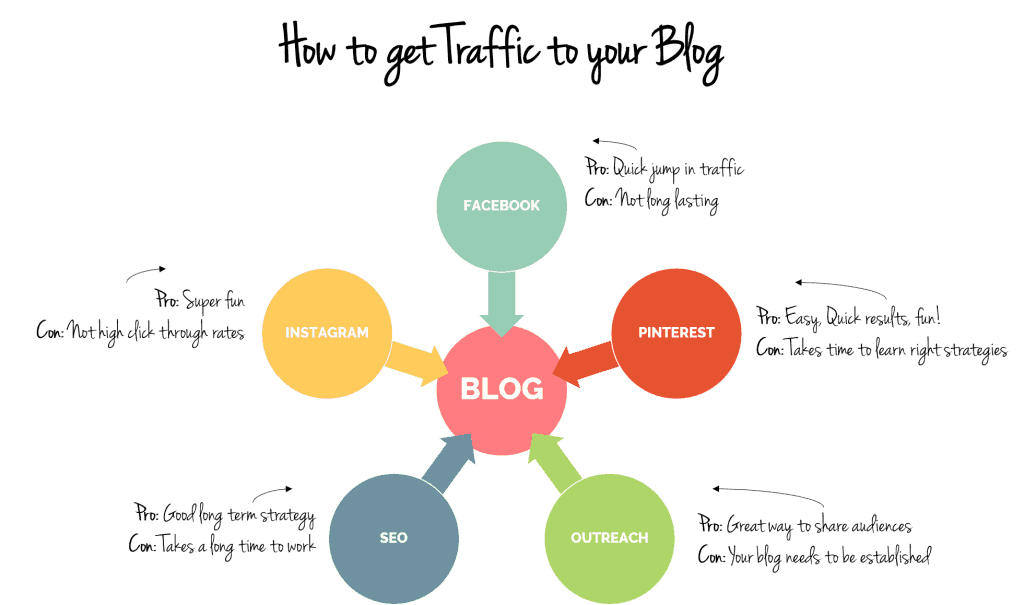
Step 30: Share share share!
Promote your posts and freebie on Pinterest and Facebook. You’re welcome to use the Tailwind looping strategy I explain in this post. It has helped me grow my traffic immensely with Pinterest by only spending 15 minutes a week on it. It’s a huge time-saver. Here are additional tips to get more traffic to your new blog.
Step 31: Look back and analyze
Evaluate your 1st month and write down an improvement plan for month 2 At the end of the month, sit down with a cup of coffee and write down all the things you learned.
- What went well?
- What was a waste of time?
- What do you want to do next month?
If you have a plan, you will succeed. Here is how I tracked my blog progress when I was just starting out.
Bonus tip: Have realistic goals
Don’t set yourself up for failure by having enormous and unrealistic goals. Below is a very reasonable path you can follow with your blog. It’s most important to stay consistent and work a bit on your blog every day and not burn out.
CONGRATULATIONS!
I know this 31 day First Month Blog Plan is very aggressive and fast paced. If you completed all of these steps within a month, give yourself a huge congratulations! If it takes you three months to work through this plan – that is perfectly fine – and honestly, a little expected.
There is a lot to cover when starting your blog, so I hope this step by step guide helped you. If you need more in depth help and training, checkout the Blog by Number course that covers starting your blog, growing your followers, getting traffic and making money. You’re also welcome to reach out to me with any questions! xx, Suzi
100% Free Blogging Course!
Get the exact plan I followed to grow my blog from $0 to over $9,000 per month in my first year.